
Do you want to improve your car audio system? Are you debating whether or not to take on the challenge yourself, or hire a professional for the job? Installing an aftermarket car audio system can be complicated – but it doesn’t have to be.
In this article, we’ll explore the pros and cons of installing a car audio system DIY vs hiring professionals. Before we start we want to thank the experts at Athens Auto Sports for all of this great information! Read on and hopefully this car audio installation guide can help you make the right choice.
Want to save time and Hassle, click here to schedule an installation consultation.
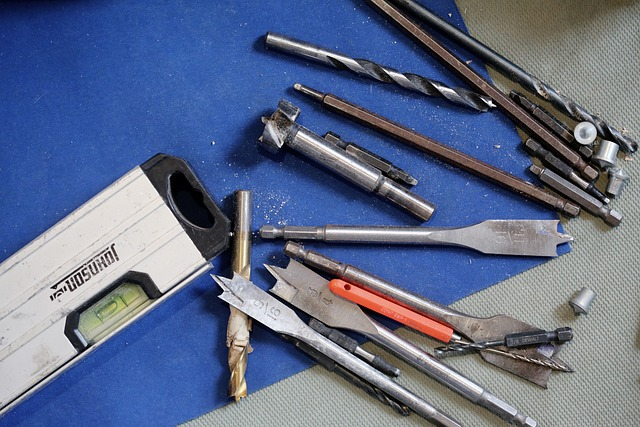
Pre-Installation Checklist
Before you start installing a car audio system, it’s essential to do your homework. Research the parts and components required for your specific installation as well as any wiring harnesses or antenna adapters that are needed. Car stereo installation can be a complex process and ordering out what you need before hand will make it a lot easier.
This will save you time in the long run and provide great help during the installation process. To ensure a smooth experience, create an organized checklist of all materials needed before you begin. From speakers and amplifiers to cables and mounting brackets; having everything lined up ahead of time is key.
Assemble tools such as a screwdriver, pliers and wire cutters so they’re ready when it’s time to install. Make sure you read through all instructions on each component carefully prior to starting the installation process. With proper preparation, you’ll be ready to tackle installing your new car stereo!
Car Audio System Components
Once you have gathered all the necessary materials for your car audio system installation, it’s time to select the components of your new sound system.
You can choose from a wide variety of brands and products, such as JL Audio or Alpine. If you want great sound quality with high-end convenience features like remote start and Bluetooth compatibility, then consider investing in a more expensive model. Picking the right audio system is critical for proper car stereo installation.
Another important factor when choosing a car stereo is its size–you need one that will fit into your vehicle’s dashboard. There are many sizes available on the market, so make sure to measure before selecting one.
Additionally, some models require extra tools or accessories in stock in order to install properly; check the manual for this information before purchasing any parts.
Now that you’ve chosen the perfect car stereo for your vehicle, it’s time to begin installing it—starting with the speakers!
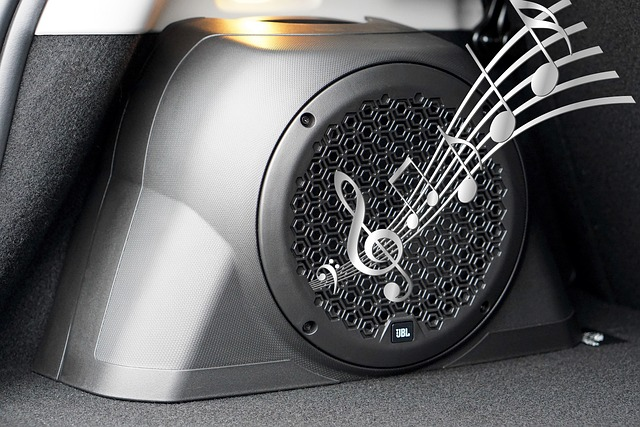
Installing The Speakers
Installing speakers is an important part of car stereo installation. Properly installing the new stereo, speakers and other components in your vehicle can make a huge difference when it comes to sound quality. When you’re ready to install your speakers there are two ways to go: DIY or hire professionals.
The DIY option is more cost effective, but requires some skill with tools and knowledge about how car audio systems work. You’ll need either basic hand tools or specialized installation tools for the job.
Hiring a professional installer may be more expensive than doing it yourself but they will have all of the right tools needed plus experience that could come in super helpful if something goes wrong during installation – which it often does!
If you decide not to hire a pro, read any car stereo installation instructions carefully before performing any steps and check out online resources that explain different methods for correctly mounting and wiring your car’s audio equipment.
Check out these awesome customizations done by Athens Auto Sports!

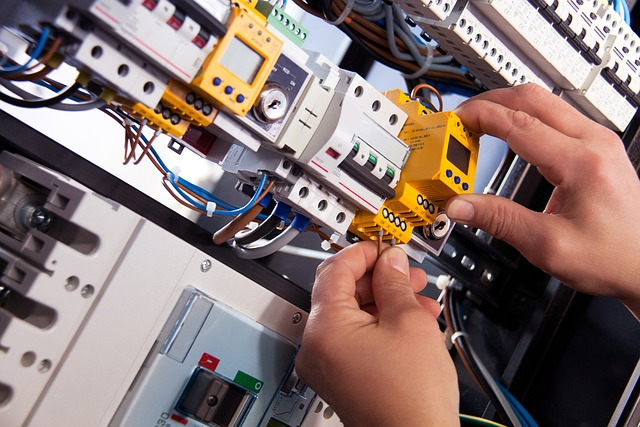
Mounting And Wiring The Amplifier
Mounting and wiring the amplifier is a crucial step in car stereo installation. Whether you’re opting to DIY or hire professionals, mounting and wiring should be done correctly for optimal sound quality.
If you choose to go with a professional installer, they’ll take care of all the heavy lifting for you. However, if you want to save money on installation costs, then doing it yourself can be very doable – as long as you understand exactly how to mount and wire up that new stereo.
Steps To Mounting An Amplifier:
- First, determine where your amplifier will fit best within the confines of your vehicle’s interior – often this is under one of the seats but check out other possible locations too. Make sure there are no moving parts nearby that could cause any mechanical damage when driving around corners or over bumps in the road.
- Next up is connecting power cables from battery terminal (or fuse box) through to the amplifiers positive input terminals and grounding points which usually require 12 gauge wires at least 8” away from any metal surfaces before entering the cabin space itself.
- Lastly, connect signal cables between head unit output channels – typically RCA connectors – and amps input sockets using either low level RCA leads for preamp connections or speaker outputs depending on setup requirements.
Want to see more more awesome customizations? Click here to learn more about Athens Auto Sports!
Connecting The Head Unit To The Amplifier
Now it’s time to connect the head unit to the amplifier.
Steps For Connecting Head Unit To Amplifier:
- First, make sure you have all the necessary wiring supplies and tools on hand. You’ll need speaker wires, power supply cables, RCA cables, a crimping tool and electrical tape.
- Next, run your positive and negative power supply cables from the battery to the amp’s power terminals. Then attach one end of each RCA cable to the preamp outputs on your head unit and plug them into their corresponding inputs on the back of your amplifier or processor.
- Finally, use your crimping tool to securely connect both ends of each pair of speaker wire to its respective terminal at both locations (head unit and amp/processor). Your car audio system is now ready for sound testing!

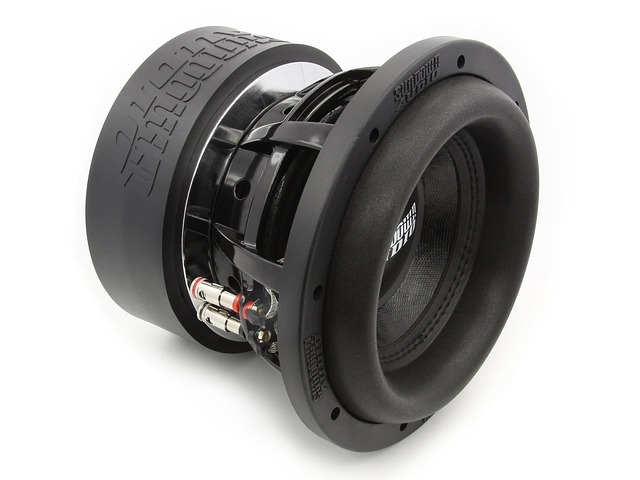
Installing A Subwoofer
Installing a subwoofer is an important step in setting up your car audio system. Many people choose to do it themselves, but there are advantages to having a professional install the equipment.
DIY radio installation requires attention to detail and knowledge of how car audio systems work, as well as tools that can be expensive to purchase or rent. Professional installations often come with warranties for the equipment, so you know your investment will be secure if something goes wrong.
When installing a subwoofer yourself, make sure you have all the necessary components like wires and mounting brackets before beginning. You’ll also need access to the interior of your vehicle’s trunk or cabin where most subwoofers are mounted. It is important to read instructions carefully and take time when wiring everything together.
Once ready, securely mount the box containing the subwoofer into its designated spot in your vehicle and run cables from it through panels such as floor mats or trim pieces so they are concealed behind them.
After finishing this stage, you should now have a fully installed subwoofer ready for testing before finalizing installation.

Testing The Sound System Before Finalizing Installation
Now that the subwoofer is installed, it’s time to test the sound system and make sure everything has been properly connected. To do this, turn on the audio source – whether it be a phone, iPod or other device – and check for any signs of distortion.
Listen carefully for any rattling noises as well as overall clarity in each speaker before adjusting the volume accordingly. If anything sounds off, double-check your connections and wiring to ensure all components are securely attached.
After testing out the sound system, it’s important to consider both DIY installation pros and cons before finalizing your car audio setup. While installing a car audio system yourself may save money upfront, professional installation services provide more reliable results due to their expertise in connecting various components together seamlessly.
DIY Installation Pros And Cons
Installing a car audio system yourself offers several advantages. Cost is one of the main benefits, as DIY installation saves you from paying for labor costs associated with professional installation.
Additionally, by doing the job yourself, you can customize your setup to fit your exact needs and preferences in terms of wiring, routing and components. Furthermore, if any problems arise during or after installation, you will have a better understanding of how to troubleshoot them due to having done everything first-hand.
On the other hand, there are some potential drawbacks associated with DIY car audio systems that should be taken into consideration before beginning the project.
If something goes wrong while installing an audio system—such as incorrect wiring or improper mounting—it could result in poor sound quality or even damage to both your vehicle’s electrical system and its interior panels.
Professional Installation Pros And Cons
When it comes to car audio system installation, there are pros and cons to hiring a professional installer. Professionals have years of experience with installing such systems in cars, so they know how to properly install the components that come with the kit as well as any additional parts or upgrades you may want to make.
Another advantage of hiring professionals is that they will guarantee their work with a warranty against any defects or malfunctions caused by improper installation. This gives peace of mind knowing that if something goes wrong within the warranty period then it will be fixed free of charge. Furthermore, most professional installers offer technical support after installation should you ever run into any issues while using your system.
On the other hand, just because someone has installed car audio systems before doesn’t necessarily mean they do a good job every time – bad installations still happen even when done by professionals.
Hiring A Professional Installer
Hiring a professional car audio installer may be the best option if you don’t have much experience in installing your own system. They will come to your home or business and install everything for you, saving time and resources while ensuring that it is done properly. Professional installers typically charge an hourly fee of around $50 to $200 depending on the complexity of the job.
It pays to do some research before hiring an installer. Ask friends who’ve had work done recently, read online reviews from previous customers, and look up customer feedback with organizations such as the Better Business Bureau (BBB). This can help ensure that the company you choose is reputable and experienced enough to take on your installation project.
Common Mistakes To Avoid During Installation
Many people may be tempted to take on a car audio system installation as a DIY project. While it is possible to do, there are several key mistakes that can be made if the proper knowledge and tools aren’t available.
Common Mistakes In Car Stereo Installation:
- The first mistake is not having the right wiring setup. Without appropriate wiring in place, it will be difficult to ensure the best sound quality from your new components.
- A second issue could be incorrect mounting of speakers or amplifiers in vehicles. If these items are not securely attached, they may fall out when driving over bumps or uneven surfaces.
- Finally, making sure all settings have been correctly adjusted for optimal performance should never be overlooked either.
Conclusion
In conclusion, installing a car audio system can be an enjoyable experience with the right knowledge and tools. It’s important to understand your vehicle’s electrical system before beginning any installation project. If you’re comfortable doing it yourself, there are many resources available online that provide detailed instructions for completing each step of the process. However, if you don’t feel confident about your abilities or have no prior experience in electronics installations, it’s best to hire a professional who is experienced in this type of work.
Brands Athens Auto Sports Works With:
![]()
![]()
![]()
![]()
![]()
![]()
![]()
![]()
![]()
![]()
![]()
![]()
![]()
![]()
![]()
![]()
![]()
![]()